 |
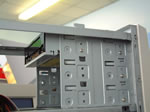
The disc drives are held in metal boxes within
the case (called "caddies")
You will see that the front of your computer case has a number
of removable plastic panels, with a snap off metal guard straight
behind. Decide where you would like your CDROM device, and remove
the plastic and metal covers. Slide the drive in from the front
of the case, and fasten it in place with two screws on each side.
The drive will need connecting (see end of page) |
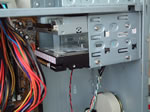 |
Underneath the large 5 inch drive caddie is a
smaller three and a half inch one that is intended to be used
with floppy disc drives and hard disc drives. Instalation is identical
to the CDROM, except that the hard drive is fitted inside the
case without having to remove the front panels.
Click on the image to see an alternative position to mount the
hard drive. |
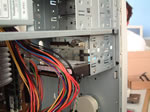 |
This is another view of the smaller drive caddie. |
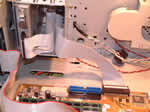 |
The floppy drive is connected using a special
ribbon cable which appears to have some of the ribbon twisted
half way through the cable. Plug one end into the socket on the
Motherboard, and the other into the floppy disk drive itself.
The plugs and sockets should only mate one way, be careful not
to bend any pins.
On this image, you will see that the spare ribbon cable has been
tucked into the small drive caddie. |
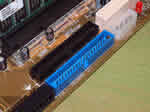 |
The other drives are connected using a system
called IDE (integrated drive electronics). This motherboard has
two IDE channels, and both channels can support two devices.
This image shows bothe of the IDE channels, one connector is
black and the other one is blue.
|
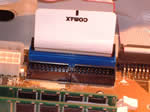 |
Channel 1 uses a much faster system called UDMA
100. This channel has a blue connector on the motherboard, and
should be used with a special UDMA100 ribbon cable. Plug the blue
plug into the blue socket on the motherboard, making sure that
you dont bend any pins.
The other end of the UDMA ribbon cable should be plugged into
the hard drive. |
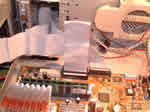 |
You should not mix UDMA 100 devices with slower
drives (normal IDE drives such as CDROMS etc) It si possible to
connect two IDE drives to the same channel, and we are going to
connect a ZIP drive and a CDRW drive.
This image illustrates how the ribbon cable has been folded to
make its path through the inside of the case less obtrusive. |
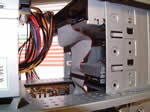 |
The ZIP drive is a three and a half inch device,
but on this workstation it has been installed into a larger bay
using a speical fixing kit. The ribbon cable is plugged into both
the ZIP drive and the CDRW |