Consult the instructions that came with your motherboard, and decide
which PCI slots you are going to use for any extra cards that you want
to use. You will be restricted slightly because certain PCI slots share
"interrupts" with other slots.
 |
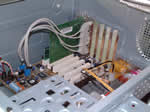
You need to connect the audio connector from
your CDROM drive to the sound card so that you can listen to CDs
through your PCs sound system. The CDROM drive will have come
with a connecting lead, which is usually terminated with the same
type of connector on each end. Plug one end into the CDROm drive
and route the cable down to the PCI card slots |
 |
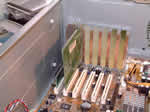
The PCI cards fit into slots on the motherboard,
with one side of the PCI card exposed through a hole in the case.
In this image, we have removed all of the metal slot covers from
the case.
Insert the card carefully, making sure that it is properly plugged
into the motherboard. Secure the card (this one is a network adapter),
with a screw. |
 |
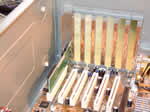
Continue to add PCI cards in sequence.
The WinTV card is quite tall, be careful not to twist the card
when you insert it. |
 |
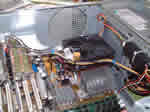
The Asus P4B266 motherboard has four additional
USB 2.0 slots which use a "riser" that is plugged into
one of the PCI slots instead of a card. The trailing leads need
to be connected to the relevant place on the motherboard.
|
 |
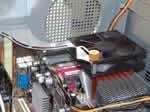
This soundblaster card will generate a lot of
heat, so it is ideally situated next to the USB riser connector
because the heat will not cause any damage. |
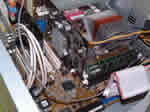 |
Whilst most of the above cards are optional, the
VGA card is essential. The VGA card (this is an NVIDIA 4MX 64mb)
has a special slot on the motherboard because it uses a much faster
data bus. Handle the VGA card carefully, and make sure that you
close the "gate" clip on the end of the card. This particular
system would not boot up because the clip was inadvertently left
open |
 |
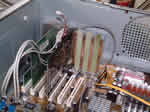
The Zelman flower cooler uses a large fan held
above the heat sink with a bracket that connects to the PCI slots.
The fan uses a small device to slow the speed of rotation down
and therefore reduce the noise that the fan produces. This is
only advisable when a very efficient heat sink such as the flower
is used. |
 |
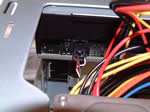
Now that the internal components are all installed,
you should spend a small amount of time and effort neatening the
cable runs up inside the PC. The fan bracket is ideal for routing
the CDROM audio cable and the additional 12v motherboard connector.
I was initially sceptical about connecting a power cable next
to an audio cable, but there was no loss in audio quality. This
image also shows the black fan speed controller secured neatly
onto the case with cable ties. |