| |
This page describes the initial building process, adding
the components to the case.
Click on any image for a larger, full screen view.
Click here to go back to the previous
page
Click here to go to page three
Stage 2 The Motherboard - contd
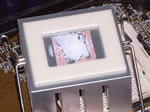 |
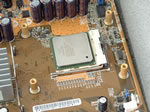
The underside of the northbridge heat sink must
also be cleaned. Use a sharp knife to scrape away the old plastic
transfer tape.
Carefully smear a very small amount of thermal transfer compound
(available from Electrolube, address at end of instructions).
It is vital that you use the very minimum of compound. Place the
heat sink back on the chip, slightly off centre and apply pressure
at the same time as twisting the heat sink into position. This
thins the compound even further, so that the compound does exactly
what it should do, i.e. transfers heat from the chip to the heat
sink If there is too much compound it tends to prevent efficient
transfer. The heat sink can then be clipped back in place. |
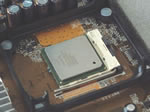 |
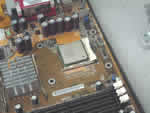
The main processor chip is held in place with
a zero insertion force (ZIF) socket. Lift the arm at the side
of the socket and look carefully at the pattern of holes on the
socket. You will see that one corner of the socket has a pin missing.
The Processor chip must be dropped into the socket, and obviously
has to be orientated the correct way so that the missing pin aligns
with the missing hole!
The lever on the ZIF socket can now be closed.
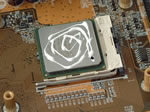
Surrounding the processor is a large plastic bracket that is used
to hold the processor fan. Follow the instructions that come with
your fan, making sure that you apply thermal transfer compound
to the processor chip in a similar way to the northbridge chip.
The processor chip has a larger surface area than the northbridge
chip and it is harder to ensure a good fit. Take your time - this
is vital. |
| |
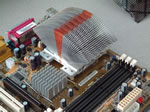
It is good practice to use efficient cooling, and the above
sequence of pictures show how a Zelman cooler can be installed.
As this is not essential, I have included the instructions on
how to install this cooler on a separate page, click on any of
the above images to view this page. |
Click here to go to page three
|